Do you own a flashy SLR camera, but have no idea what all the bells and whistles are for? Do you want to be a better photographer, but don’t have the time, patience or dedication required to master the art of photography? If you answered yes to these questions, this is the article for you!
We recently spent a morning with Michael Snedic, owner and operator of WildNature Photo Expeditions. He’s been working with Encompass Africa since 2014 and is one of Australia’s most accomplished and talented wildlife and nature photographers. Who better to give clear, fuss-free advice about getting great shots of wildlife when you’re on holiday in Africa?
Before we list his tips, there’s one important point he stressed: While there are obviously many different brands and types of cameras, this is just a general guide. Many of the icons and features mentioned are standard, but be aware: they might be located in a slightly different place on your actual camera, or perhaps even have a different symbol.
But once you’ve worked out where they all are, this little cheat sheet will help anyone wanting to improve the quality of their photos without having to get a degree in photography or 20 years’ experience. Don’t worry if you’re a total beginner or don’t understand these tips – you just need to follow them!
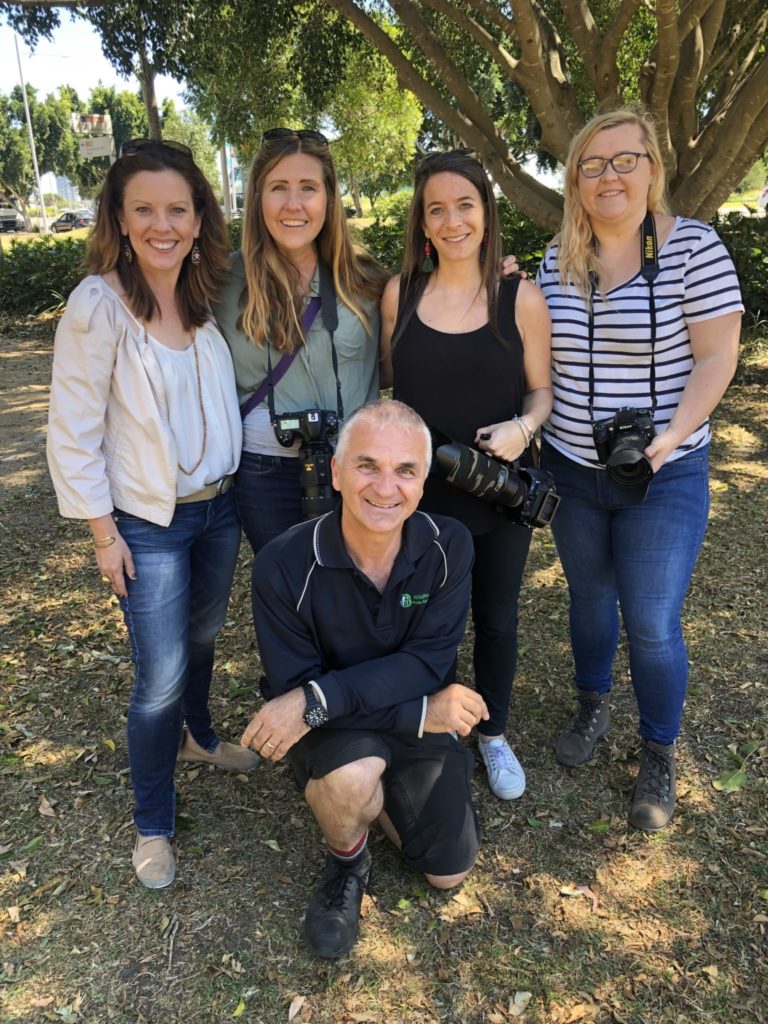
The Encompass Africa team training session with Michael.
#1: How can I prevent my photos from being blurry when there’s not much light and I’m hand-holding my camera and lens?
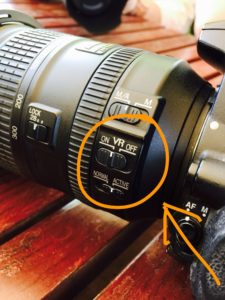
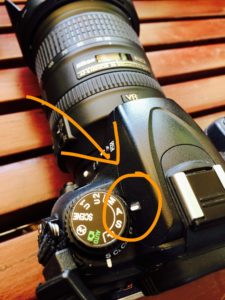
Look for the button that says “IS”, which stands for “Image stabilisation” (if you’ve got a Nikon lens it will say “VR” for Vibration Reduction, and if you’ve got a Sigma lens it will say ‘OS’ for Optical Stabilisation, but it’s the same thing).
Simply switch this to “on” (if the only options are on and off) when you’re shooting in low light, to improve the quality of your shots. Without it, in low light, your images will be blurry.
When the light is good again, turn off this button (but don’t worry if you forget – it won’t affect your images).
#2: What are all those letters on the dial of my camera?
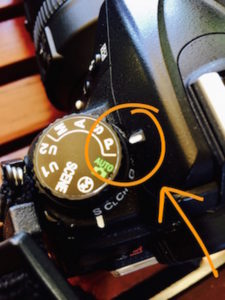
On most SLR cameras you’ll see the letters “P”, “S”, “A” and “M”. They’re all exposure modes, but you can forget about most of them. Just know that for normal, everyday shots, having your camera set to “P” (“programmed auto”) is generally fine.
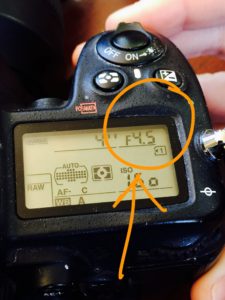
When you’re taking photos of moving wildlife in the glare and dust of Africa, however, your best bet is to set your camera’s dial to “A”, which stands for “aperture”. Have you ever heard the term “F-stop” when it comes to camera settings? This is the same thing.
Once you’ve set your camera to “A”, you want to set the number to the absolute lowest that your lens allows – it should be somewhere between f4 and f5.6, depending on your lens. This is the optimum range for photographing wildlife in Africa.
#3: How can I take good photos when it’s dark?
In this instance, ISO is your friend. It stands for “international standards organisation”, but that’s not important. The important thing to know is that ISO is all about your camera’s sensitivity to light. Long story short: leave your camera on auto ISO during the day, but if you’re taking photos when it’s darker and you need more light, you need to increase the ISO.
Another tip: be sure to rest your camera on a bean bag, tripod or monopod when you’re taking photos in low light. That way, even if the shutter speed is low you can get sharp shots.
#4: How can I get a great photo of an animal if it’s running or flying?
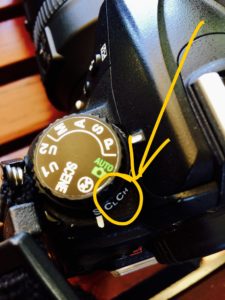
When you’re trying to photograph wildlife in Africa, it’s very important you have your camera set to “continuous focus”, as the animals will often be moving. Look for the “CH” (“continuous high”) button.
In continuous focus mode, as you hold down the shutter button, follow the animal that’s moving with the focus point and the focus will stay on your subject. Use this mode in conjunction with burst-mode.
Tip: If your camera keeps focusing on something you don’t want it to (for example, if you’re trying to photograph a gorilla but the camera keeps focusing on branches in the foreground), flick to “M” (manual), manually focus and continue shooting. Just remember to flick back to “A” (“aperture”) once you’re done!
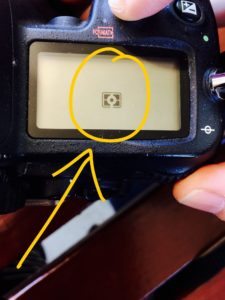
#5: How can I get a great shot of a group of animals? The lighting never seems to be right
You need to adjust your light metering, which is used to measure the brightness of a subject or scene. If you’ve got a whole group of animals, you need to select the setting that will average the light reading of the entire scene, and not just a single animal. To do this, you simply need to click on this button:
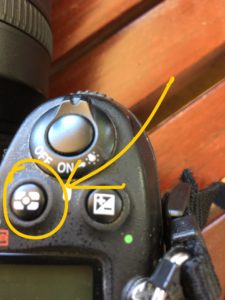
Then move this wheel:
until you get to this icon:
Easy!
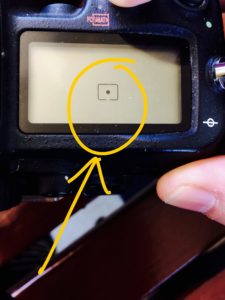
If you are just photographing a single animal with a bright background, stop at this icon:
#6: How can I stop my photos looking “overblown”?
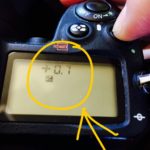
To avoid overblown shots you need to adjust the “exposure compensation” button. That’s the one that looks like a plus and minus sign:
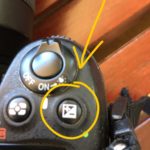
To get rid of glare when you’re shooting wildlife in the African sun, especially in the middle of the day, change the number from zero to -1 (or slightly higher if your shots are still overblown).
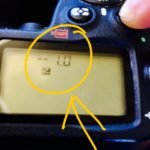
(When you’re shooting in “normal” light again, don’t forget to put it back to zero, otherwise your shots will be dark.)
Tip: If you’re photographing wildlife in Africa, you’ll pretty much always have this setting on zero or -1. The only time you’d ever need to change it to a positive number is if you were shooting a very dark animal (e.g. a gorilla), in which case you might go up to +0.3 or +0.7 (but never anything above +1).
Don’t understand any of this? Don’t worry, you don’t need to! Just know that the plus/minus button on your camera can come in handy if your shots are overblown in the full sun. Change the number to -1 and you should notice a helpful difference.
#7: How can I photograph something that’s white without it looking like another colour?
This is not something we really understand, but just know you should have your “white balance” (“WB”) on auto. This will ensure white looks white, instead of throwing any other colours thanks to the light source. Incorrect white balance can make images look too blue (cold) or too orange (warm).
[This is set in the menu section]
#8: Should I keep my prescription glasses on when I’m taking a shot?
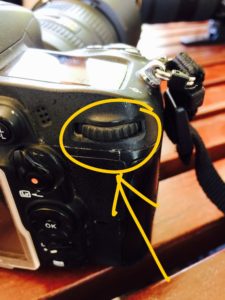
- If you’re having trouble seeing clearly in your viewfinder and you wear glasses, you might want to try adjusting the diopter. It’s a dial you can rotate that will affect the “prescription” of your viewfinder by changing the magnification. Just turn the dial until it’s in focus, and then shoot all your images in this setting.
[This is set on the viewfinder]
Good luck and happy snapping!